Lesson 1,
Topic 1
In Progress
Drawing the Bounding Box
Follow the steps below for drawing the bounding box:
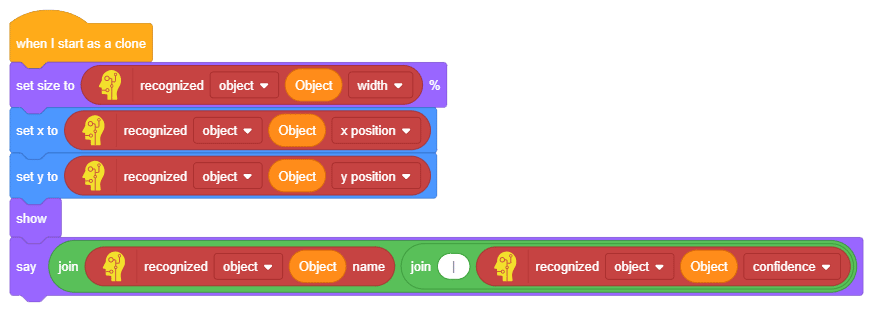
- Add a when I start as a clone block into the scripting area from the Control palette.
- Snap a set size to ()% block below the when I start as a clone block.
- Add a recognized () () () block as the input of the set size to ()% block. Change the type to object and option to width. Next, add the Object variable as the input of the object number.

- Next, add a set x to () block and a set y to () block and repeat step 3 for both the blocks as shown below:

- Snap a show block from the Looks palette.
- Add a say () block below the show block.
- Add two join () () blocks.
- Display the object name and object confidence using the say block as shown below.
Your project is complete! Click the green flag to run the script.

Explore: Add other backdrops from the internet and try to identify objects.
Assignment
Before you move on to the next lesson, a small assignment awaits you!
You must upload the PictoBlox program you wrote in this activity to the website.
Submitting the assignment is a must in order to receive the certificate after completing the course.
Follow the steps below to upload your assignment:
- Click Choose File.
- Select the image from the pop-up window that opens up.
- Once the image is selected, click Upload Assignment.

The file type allowed is SB3, generated from the PictoBlox program. The maximum file size allowed is 15 MB.
Good luck!